Baking

Alpacas, Goats, and Horses…Oh My!

We’ve all seen them. Those beautifully decorated sugar cookies. The ones that look way too good to eat, but that when you eventually do succumb are very happy you did. Perfect sugar cookies to look at and to eat. That is the dream. But that type of perfection takes a ton of practice, patience, and piping bags.

Me and James in our matching aprons

This is why when a friend of mine reached out to order some alpaca cookies, I was extremely excited for the opportunity to practice my skill some more. Her and her husband own a plot of land with several different types of animals on it. Alpacas, goats, horses, chickens, turkeys, and a very sweet elderly dog.

The cookies were for an upcoming Shearing Party for the alpacas, which happens every year.

My little baking assistant

Once the order was placed, I quickly ordered my alpaca cookie cutters from Amazon. (What? Did you expect me to already have alpaca cookie cutters on hand?) During my process of creating an order, I enjoy looking on Pinterest for design inspiration. While cookie at the various alpaca cookies, I was overwhelmed at how intricate they all were. So much little detail and several colors. I know I can eventually get to that level, but for the time being baby steps. My challenge was to push my design on the cookies without pushing myself too much and creating something horrible.

For this exact reason, I bake a few extra cookies to decorate. Those spare cookies are my “practice” cookies. They help me to see if what I’m picturing in my head translate well on the cookie. I’m so happy I had a few cookies to practice on, because I had a few very scary results before I perfected the look for the alpacas.

My horrible practice cookies

The biggest decision I had to make were about the eyes. When I tried to pipe them on my practice cookies, they turned into a thing of nightmares. Not cute at all. I went back and forth on these the rest of the day. It wasn’t until Roydon came home that a solution was discovered. Roydon suggested bypassing the eyes for the cute puffy fringe on the forehead. I was so grateful for his idea because it was exactly what was needed.

I was so happy with the final result.

It was decided that I would take James and drop the cookies off at her house so we can walk around and see all of the animals. I was excited to see how James would react to the different animals.

The first animals that he met were the goats of various sizes and colors. They licked at his bare feet and made him giggle. He even tried to reach out to them to pet once or twice. I didn’t expect that, since I don’t trust goats. They are very suspicious, but James had a lot of fun with them.

Next were, the alpacas. James wasn’t too sure of them. He would squeal at them if they reached their necks close to him. We tried to see if he would touch them but he was not having it.

After a bit we moved on to the horses. There was a horse dentist cleaning the horses teeth while we were at the barn. I found it oddly fascinating, because who would have thought? I’m sure my Mom would shake her head at this because of course horses had dental work done. There was a beautiful young horse who was absolutely the sweetest thing. She would poke her nose through the fence and James loved petting her. Though he did try once or twice to grab at the horses nostrils. This child.

After a bit, said our goodbyes, and headed back home with a carton full of fresh eggs. I think we’ll definitely have to return again.

The Best Sugar Cookies

(From Sally’s Baking Addiction)

Prep: 2 Hours

Cook: 12 minutes

Yield: 24 4-inch cookies

Ingredients

2 and 1/4 cups (281g) all-purpose flour

1/2 teaspoon baking powder

1/4 teaspoon salt

3/4 cup (170g) granulated sugar

1 large egg, room temperature

2 teaspoons pure vanilla extract

1/4 or 1/2 teaspoon almond extract

Royal Icing

(From Sally’s Baking Addiction)

Prep: 5 minutes

Yield: 3 cups

Ingredients

4 cups (480g) powder sugar, sifted

3 Tablespoons meringue powder

9-10 Tablespoons room temperature water

optional for decorating: gel food coloring

1. Whisk the flour, baking powder, and salt together in a bowl. Set aside.

2. In a large bowl using a hand mixer or a stand mixer fitted with a paddle attachment, beat the sugar and butter together on high speed until completely smooth and creamy, about 2 minutes. Add the egg, vanilla, and almond extract (if using) and beat on high speed until combined, about 1 minute. Scrape down the sides of the bowl and beat again as needed to combine.

3. Add the dry ingredients to the wet ingredients and mix on low until combined. Dough will be relatively soft. If the dough seems too soft and sticky for rolling, add 1 more Tablespoon of flour.

4. Divide the dough into 1 equal parts. Place each portion onto a piece of lightly floured parchment paper or lightly floured silicone baking mat. With a lightly floured rolling pin, roll the dough out to about 1/4-inch thickness. Use more flour if the dough seems tops sticky. The rolled-out dough can be any shape, as long as it is even;y 1/4-inch thick.

5. Lightly dust one of the rolled-out doughs with flour. Place a piece of parchment paper on top. (This prevents sticking.) Place the 2nd rolled-out dough on top. Cover with plastic wrap or aluminum foil, then refrigerate for at least 1-2 hours and up to 2 days.

6. Once chilled, preheat the oven to 350 degrees Fahrenheit. Line 2-3 large baking sheets with parchment paper or silicon baking mats. Carefully remove the top piece dough piece from the refrigerator. If it’s sticking to the bottom, run your hand under it to help remove it. Using a cookie cutter, cut the dough into shapes. Re-roll the remaining dough and continue cutting until all is used. Repeat with 2nd piece of dough.

7. Arrange cookies on baking sheets 3 inches apart. Bake for 11-12 minutes or until lightly browned around the edges. If your oven has hot spots, rotate the baking sheet halfway through the bake time. Allow cookies to cool on the baking sheet for 5 minutes then transfer to a wire rack to cool completely before decorating.

8. While the cookies cool, in a large bowl using a hand mixer or a stand mixer with a whisk attachment, beat all of the icing ingredients together on high speed for 1.5-2 minutes. When lifting the whisk up off the icing, the icing should drizzle down and smooth out within 5-10 seconds. If it’s too thick, add a little more water. If it’s too thin add more powder sugar.

9. Decorate the cooled cookies with royal icing. Feel free to tint icing with gel food coloring. No need to cover the decorated cookies as you wait for the icing to set. If it’s helpful, decorate the cookies directly on a baking sheet in the refrigerator to help speed up the process.

10. Enjoy the cookies right away or wait until the icing sets to serve them. Once the icing has set, these cookies are great for gifting or for sending. Plain or decorated cookies stay soft for about 5 days when covered tightly at room temperature. For longer storage, cover and refrigerate for up to 10 days.

Baking, Uncategorized

The Viennese Whirls Challenge

This past Sunday, I had booked us in for a family portrait session. Since James was born, we haven’t had a good picture of the three of us. I thought that this upcoming holiday season was a good reason to get some nice holiday photos. We planned this for months. Painstakingly figuring out outfits for all three of us. What color scheme to use and if it was possible to wear what we already owned. Roydon had a very nice green button up shirt and a silver tie. The rest of our outfits went off of that. I happened to already own a silver sparkly sweater that would match and look festive. The only thing we needed was an outfit for James.

I found the perfect little set. It was a green, plaid button up shirt with khakis and a gray bow tie. We switched out the khakis for jeans so we could all match. I was so excited to see my little man all dressed up. He looked so adorable. I couldn’t stop giggling and cooing over him. James seemed to like his ensemble as well. After getting ourselves ready we were on our way. We parked and started getting James out of the car seat when we realized that he had blown out of the diaper and up his back. What were we to do?! We did not have as spare change of clothes that would be appropriate for our pictures. We ended up changing his diaper and wiping down James and his nice clothes as best as we could. We then proceeded to take the pictures and hurried home to throw his clothes in the wash.

Besides that unfortunate incident, the photo session went incredible well. We have some very sweet pictures of James and of our little family. I’m so excited to get them in the mail. James is so darn photogenic. 

It’s buttery, it’s crumbly. It almost dissolves in your mouth. Absolutely delicious” ~Paul Hollywood

I got to be honest, I almost forgot to do the challenge this week. Between James’ early morning jam sessions and attempting to keep up with my daily chores, I completely lost track of time. Before I knew it, it was already Thursday. Luckily, this recipe had very basic pantry items, so I was able to accomplish it in no time. 

These beautifully attractive biscuit sandwiches were relatively easy to put together. A nice surprise to a very exhausting week. For the biscuits, all that was needed was butter, powdered sugar, flour and corn flour (or as we Americans use, corn starch). That hardest part came in piping the batter in pretty swirls. The batter was extremely thick, and it took all of my strength to get it out. I wouldn’t say they were a very pretty sight, but it’ll do. While they baked in the oven, I started on the filling. 

L

The filling was also simple to put together. It was basically similar to an American buttercream; butter, powdered sugar and a small bit of vanilla extract. That was whipped up until it came together to a creamy consistency. 

While I was laying out the cooled biscuits to begin assembling, I was joined by my little assistant. He recently discovered the kitchen and always makes his way in to join me. Can’t say I minded too much and he was so proud of himself.  

I just want to note that while the recipe includes making your own raspberry jam, I did not. I have tried making jam before and I haven’t quite mastered it. The jam always ends up way too liquidly which wouldn’t work in this case. So instead of ruining the rest of the challenge, I opted for using some raspberry preserves that I had on hand. 

I spread the raspberry preserves on one side of the biscuits and then piped the other biscuit with the icing filling. I then started to press the two sides together. On my first attempt, I cracked one of the biscuits. I didn’t realize they’d be so fragile. I was careful with the rest of them, but still managed to break on other one. They looked so amazing. I could not wait to try one.

OH. MY. GOODNESS. These were so mouthwateringly good! They simply melted in your mouth! The combination of fruit and icing was such a flavorful. I shouldn’t be surprised with how much they melted in your mouth considering they are basically nothing but butter. I will definitely be making these again. Though I better start doing some hand exercises. 

Viennese Whirls

(pbs.org)

Ingredients:

For the jam

200g (7 oz) raspberries

250g (9 oz) jam sugar

For the biscuits

250g (9 oz) very soft unsalted butter

50g (1 ¾ oz) icing sugar

225g (8oz) plain flour

25g (1 oz) corn flour

For the filling

100g (3 ½ oz) unsalted butter, softened

200g (7 oz) icing sugar, plus extra for dusting

½ tsp vanilla extract

Directions:

1. For the jam, put the raspberries in a small, deep-sided saucepan and crush them using a potato masher. Add the sugar and bring to a boil over a low heat. When the sugar is melted, increase the heat and boil further for 4 minutes. Remove from the heat ad carefully pour into a shallow container (pass it through a sieve if you’d rather not have seeds in your jam). Leave to cool and set.

2. For the biscuits, preheat the oven to 375° F. Line 3 baking sheets with non-stick baking parchment. Using a 2in round cutter as a guide, draw 8 circles on each sheet of paper, spaced well apart. Turn the paper over so the pencil marks are underneath.

3. Measure the butter and icing sugar in a bowl and beat until pale and fluffy. Sift in the flour and corn flour and beat well, until thoroughly mixed. Spoon the mixture into a piping bag fitted with a star nozzle. Pipe 24 swirled rounds (not rosettes), inside the circles on the baking sheets.

4. Bake in the center of the oven for 12-15 minutes, until pale golden-brown. Cool on the baking sheets for 5 minutes then carefully transfer to a wire rack to cool completely and harden.

5. For the filling, measure the butter into a bowl and sift the icing sugar on top. Add the vanilla and beat with a wooden spoon or an electric whisk until very light and smooth. Spoon into a piping bag fitted with a large star nozzle.

6. Spoon a little jam onto the flat side of 12 biscuits and place jam side up on the cooling rack. Pipe the butter cream over the jam and sandwich with the remaining biscuits. Dust with icing sugar to finish.

Baking

The Jaffa Cake Challenge

My husband and I have been having a very exhausting week. Why may you ask? Because of my little baking assistant. Our little boy is going through some major growing, and with that comes a crazy sleep schedule. He wakes up multiple times a night wanting to be fed and held, but as soon as he is put back in his crib after falling asleep, his eyes snap wide open and he starts fussing again. Frustrating. 

I think we can all admit that this has been one crazy week. Tensions are high, and uncertainty is in the air. For my part, I feel extremely anxious and stressed. I’ve been doing my best to stay busy and to keep my mind occupied. I’ve roasted our jack o’ lantern and made about 5 cups of pumpkin puree. This will make many delicious pumpkin breads in the near future! I made a batch of chewy oatmeal chocolate chip cookies. I also deep cleaned the oven which desperately needed it. It was so bad that I couldn’t see through the window. I’m telling you, that feeling of satisfaction and accomplishment from getting it cleaned was unparalleled. Is this what adulthood is all about? I also made hot and sour soup from scratch one day. This has been something that’s been on my bucket list to make. It was absolutely delicious! Last but not least, I finally made this week’s challenge: Jaffa Cakes. Stress baking, cooking, and cleaning at its finest!

They’re a great British Classic…It’s got to be absolutely perfect” ~Mary Berry

I was pleasantly surprised at how simple the recipe for Jaffa Cake seemed to be. It literally only had 8 ingredients. The first thing to do was to start on the orange jelly. Now apparently the Brits make their jelly by adding boiling water to cubs of jelly concentrate. I couldn’t find anything remotely like that here so I settled for buying an orange pack of Jell-O. I followed the instructions on the box, with one exception. Instead of adding the Jell-O to one dish to harden in the fridge, I split it between two dishes. This was to make sure the Jell-O circles were thin enough to be added to the top of the cakes. With the Jell-O left in the fridge to set, I started on the sponge. 

One large egg and the sugar were whipped together until light and thick. Then, the flour was gently folded in. That’s it! I couldn’t believe how simple it was. A teaspoon of the batter was then scooped into each muffin tin and placed in the oven for only 9 minutes. Again, I’m telling you this recipe was far simpler than I thought it would be!

The last part was melting the chocolate over a double broiler. I was now ready for the assembly!

The first part was to cut small circles out of the Jell-o. This proved to be simple enough until it came time to actually get them out of the dish. Every time I tried to grab a Jell-o circle, it would fall apart. I finally had enough beautiful orange circles of Jell-o placed on top of the cooled cakes. With the melted chocolate in a piping bag, I carefully covered the tops of the cake and the Jell-o. Once the chocolate cooled slightly, I used the prongs of a fork to make line indentations on the top. They turned out great!

The goal when biting into a Jaffa Cake was to see three layers on the inside, the sponge, jelly, and chocolate. However, when I was able to sample one, I found that my orange jelly was not visible. I’m thinking the chocolate melted them? I honestly don’t know. I could still taste orange, but just without the visual….so who knows. Maybe it’s the American jelly not being as firm and stable as British jelly. 

Next challenge is Viennese Whirls.

Mary Berry’s Jaffa Cakes

(From: BBC Food)

Makes 12

Ingredients:

For the Jelly:

1 x 135g packet orange jelly

150ml/5fl ox boiling water

1 small orange, finely grated orange zest only

For the Sponge:

Unsalted butter, for greasing

1 large free-range egg

25g/1 oz caster sugar

24g/1 oz self-raising flour, sifted

For the topping:

180g/6 ¼ oz plain chocolate (about 36% cocoa solids)

Method:

1. For the jelly, break the jelly into pieces and place in a small bowl. Pour over the boiling water and stir until the jelly is completely dissolved. Add the orange zest, then pour into a shallow 30x20cm/12×8 in tray. Chill in the fridge for 1 hour, or until set.

2. Meanwhile, preheat the oven to 365° F and grease a 12-hole, shallow bun tin with butter.

3. For the sponge, whisk the egg and sugar together for 4-5 minutes until pale and fluffy, then gently fold in the flour. Fill each well in the bun tin three-quarters full (about a dessert spoonful per hole) and smooth the tops. Bake for 7-9 minutes, or until well risen and the top of the sponges spring back when lightly pressed. Leave to cool in the tray for a few minutes then finish cooling on a wire rack. 

4. To assemble, break the chocolate into pieces then melt in a bowl set over a pan of gently simmering water. Remove the bowl from the heat and leave to cool and thicken slightly.

5. Turn the jelly out onto a sheet of non-stick baking parchment. Cut 12 discs from the orange jelly using a 5cm/2in round cutter. Sit one jelly disc on top of each sponge.

6. Spoon the melted chocolate over the jelly discs. Using the tips of the tines of a fork or a skewer, lightly press to create a crisscross pattern on top of the chocolate, then leave to set completely. You may need to reheat the chocolate a little if it starts to set before you have finished all of the jaffa cakes.

Baking

The Chocolate Soufflé Challenge

6-Months ago. 6-Months ago we were at the hospital getting to know our little boy. 6 months ago I had gone through several hours of pain, labor, and exhaustion and was now reaping the rewards. I know they always tell you how much time flies once you have children, but I never fully understood.

Every night when James goes to bed, I tend to go through all of the pictures and videos on my phone of him. I marvel at how tiny he used to be. How he would fall asleep after every feeding and how many times during the night we woke up to be with him. I miss him. Even though he’s sleeping in the next room, even though I spent the entire day with him and looked forward to bedtime for a small break, I miss him.

I’m enjoying every moment with him. I refuse to think of the future when one day he won’t need us anymore, when he won’t need me anymore. Our little bubberz. We love him so much. I often find that my chores are neglected because I don’t want to put him down. I’d much rather lie on the floor with him and play.

I’m sorry for the sentimental post.  Now on to this week’s challenge! 

I’ve never made one. Why have I never made a soufflé? Oh wait, because they’re a pain to make.” ~Nadiya

Luckily, my experience in making a chocolate soufflé was much more enjoyable than I anticipated. First however, I went on a mission to find four ramekins since they were not a part of my kitchen inventory. When I got to the store, I found that there were exactly four left. However, only three of them were the same color. So it came down to either having a mismatched set, or to go around town lugging a baby around in search of a complete set. I opted settling with the mismatched set. Call it charming, or quirky, or whatever.

I was able to make the entire sauce base of the soufflé ahead of time since these are best eaten straight out of the oven and I didn’t want to spoil our dinner. I started making the sauce base by breaking up 4 oz of chocolate and melting it down in a small pan with two tablespoons of water and milk. Once the chocolate was completely melted the rest of the milk was mixed in. 

In another pan, I melted the butter and then added the flour which created a soft dough. The chocolate mixture was then added and I combined the two together until it had thickened a bit. With a little bit of vanilla, I left the pan the cool completely. Once cooled, I beat in each of the egg yolks one at a time. I then took the egg whites and whisked them to stiff peaks with the whisk attachment of my new immersion blender. This was a purchase made after a snafu with a homemade mushroom soup and a blender. Let’s just say, I’m still cleaning up after it.

Now comes the hardest part, gently folding in the newly whisked egg whites. As Mary Berry says “If they fold [the egg whites] in too much it won’t rise. If they fold it in too little you’ll have big flecks of beaten egg whites. Not good.” It comes down to finding that perfect medium. Once the egg whites were completely incorporated in, I gently turned the mixture out in the four ramekins. Then in the pre-heated oven they went. 

The recipe I used said that they would take 10 minutes until they were done. After checking, though, I was disappointed to see that they had not risen very much and still looked extremely wet. I made the executive decision to keep them in the oven for a bit longer, which ended up being 20 minutes before I felt they were ready to be devoured. They certainly were. 

The only complaint I have is in the rise itself. While they did rise to a beautiful height, they were also cracked and domed which is apparently not supposed to happen with a soufflé. Apparently this happened because of the texture of the crème pat (the butter, flour, chocolate mixture) combining with the egg whites. As with folding in the egg whites, the texture of the crème pat needed to be just right as well. Not too watery, but also not too thick. With this knowledge in mind, I really would love to attempt making another chocolate soufflé.

With all of its flaws, we absolutely loved the flavor and the texture of the final product. I will definitely make it again. Next time, perhaps with a side of whipped cream or vanilla ice cream.

Next week’s challenge: Jaffa Cakes

Hot Chocolate Soufflés

(Mary Berry’s Baking Bible)

Ingredients:

115g (4 oz) plain chocolate

2 Tablespoons water

300 ml ( ½ pint) milk

40g (1 ½ oz) butter

40g (1 ½ oz) plain flour

¼ teaspoon vanilla extract

4 large eggs, separated

50g (2 oz) sugar

Process:

1. Pre-heat the oven to 375° and place a baking sheet in it. Grease flour 8 fl oz individual soufflé dishes or a 2 pint soufflé dish.

2. Break the chocolate into pieces and put it in a pan along with the water and 2 tablespoons of the milk. Stir over a low heat until the chocolate has melted, then add the remaining milk and bring to the boil. Remove the pan from the heat.

3. Melt the butter in a small pan, stir in the flour and cook on a low heat for 2 minutes without browning, stirring continuously. Remove from the heat and stir in the hot chocolate milk and bring the vanilla extract and leave to cool.

4. Beat the egg yolks, one at a time, into the cooled chocolate sauce, then sprinkle over the sugar. Whisk the egg whites until they are stiff but not dry. Stir one tablespoon into the mixture, then carefully fold in the remainder.

5. Pour inton the individual soufflé dishes or large soufflé dish, run a teaspoon round the edge and bake on a hot baking tray in the preheated oven for 10 minutes for the individual soufflés or about 40 minutes for the large soufflé. Dust with icing sugar and serve at once, with whipped cream.

Baking

The Mokatine Challenge

One of the greatest joys about being a mother is watching your little one grow and discover new skills. For example, James for the longest time could only roll from his back to his belly. Though he very rarely showed off his ability, despite how often I tried to get him to show me. A full month went by like that. One day, however, James suddenly started rolling over like a certified expert. Not only that, but he also started army crawling across the room. All within a span of a day! How does this happen so fast! As I’m typing this he is slowly making his way towards me. Well, actually, he’s been distracted by the large black recycle bin and has started making his way towards that. I feel snubbed. Any way…

The latest milestone has been his nap and sleep routine. Since I am a stay at home mom, I decided to forgo sleep training. I haven’t really felt the need to sleep train with him since he’s been sleeping through the night since he was 2 months old. I have come to learn that James will let me know when he’s ready. When we first started the process of transitioning him out of his swaddle, He would wake up every 40 minutes all through the night. It was highly exhausting. We stopped trying to force him out of the swaddle and decided to wait until he was ready to roll over. When that time came, we felt the urgency in getting him transition, so we tried again. It took one night. Now, he enjoys rolling all over his crib. It is kind of fun to see him in a different location in the crib than the position we left him in. 

Speaking of new skills, I really feel as if doing these challenges has helped me become a better baker. British baking is so precise, one measurement off and you get an entirely different bake. I have definitely learned from all of my mistakes, especially in the beginning. As the saying goes, “Practice makes perfect” and I agree wholeheartedly. Now on to this week’s challenge, Mary Berry’s Mokatines! 

They should be sheer perfection. The sort of thing that you find in the patisserie.” ~Mary Berry

I was very nervous going into baking mokatines since the base of the cake is a genoise sponge. If you remember in an earlier challenge, my sister and I had to bake a genoise sponge for our baking faceoff, Tiramisu Cake. I ended up mixing all of the air out of my eggs and the result was a cracker like cake. Funnily enough, a dry cake isn’t the worse thing to happen to a tiramisu cake, but for this delicate dessert would be a disaster. 

I cleared my schedule on Friday so that all I needed to focus on were the mokatines. Well, that and James of course. I started off with the genoise. I whipped the eggs up until I could trace a small pattern in them without it disappearing and I very carefully folded in all of the dry ingredients. This is where I have the biggest trouble, because you want all of the flour mixed in but the more you fold the more air escapes. Just when I thought I had the flour incorporated, I gently poured the batter into my prepared square pan. As the last bit of batter left the bowl, so did a giant pocket of unmixed flour. Gah!! Definitely not something you want. I quickly folded in the rest of the incriminating flour. At this point I’m really hoping I didn’t just kill my sponge. 

As the sponge was baking in the oven, I started on the crème beurre au moka. When making my shopping list for the week, I had looked over this recipe and found that the crème needed something called coffee essence. I couldn’t find anything like it, but I did find an easy recipe for it. All I needed was to boil coffee and sugar until it had reduced to a sort of watery syrup. After that the rest of the crème was a simple matter of melting the sugar and water over a low heat until reduced and whipping it in with the gently beaten up egg yolks. The coffee essence is then stirred into the crème. 

I took out the sponge from the oven and allowed it to cool. I was so far very pleased with how it looked. It had risen very nicely and bounced back slightly when I lightly pressed it with my finger. It was like a sponge!! What a novel idea! Once cool, I used a serrated knife to split the sponge through the middle. Then I added the crème over the top of one half and gently laid the other half on top. I then sliced the sponge into 9 even squares. I ended up using the entire amount of the crème although I was supposed to safe some for piping later. I had to go through the entire process of making the crème again, I just couldn’t believe it made such a small amount!

The coffee icing was just melting some butter in the pan with the instant coffee powder and then adding the powder sugar. 

The assembly was quite an experience. First to gone on was the icing. I dolloped a bit on the tops and allow it to coat the sides. I had to work quickly because it was setting extremely quickly. After a bit I had all nine of the sponges covered in the icing. I quickly chopped up some peanuts and started coating the sides with it. It was a challenge not to make too much of a mess, but, as my husband can attest, I failed. The final step was piping stars along the edge of the sponges. I had thought this would be the easy part. After all I have piped many cakes and cupcakes…this should have been easy. I soon found that I was struggling to get the crème piped smoothly. I think I had unconsciously trapped an air bubble in my piping bag. It made squeezing out the crème a bit impossible. Somehow I managed, until the last poor little sponge. All the pressure I had on the bag released dumping a whole pile of crème in a very unflattering way. I guess that sponge will not make it to the final photo shoot. 

I felt very proud of how they turned out. Were they sheer perfection like Mary Berry wanted? Not in the least. Most, if not all, of the cakes were slightly crooked, and my decorating could have been a tad tidier. However, I was happy with the result. I was even happier when I enjoy one of them. They were absolutely delicious! It had a nice coffee flavor, the sponge had a beautiful texture and I loved how creamy everything was. Absolutely, heavenly!

The next challenge Hot Chocolate Soufflé!

Mokatines

(From Mary Berry’s Baking Bible)

For the geneose sponge

40g (1 ½ oz) butter

3 large eggs

75g (3 oz) caster sugar

65g (2 ½ oz) self-rising flour

1 level tablespoon cornflour

For the crème au beurre moka

40g (1 ½ oz) caster sugar

2 tablespoons water

1 large egg yolk

75g (3 oz) softened butter

1 tablespoon coffee essence

For the soft coffee icing

3 tablespoons apricot jam

50g (2 oz) butter

3 tablespoons milk

1 level tablespoon instant coffee granules

225g (8 oz) shifted icing sugar

1. Pre-heat the oven to 350° F. Grease an 7in square cake tin then line the base with baking parchment. 

2. To make the sponge, gently melt the butter in a pan, then set to one side to cool slightly. Measure the eggs and sugar into a large bowl and whisk at full speed until the mixture is pale and mousse-like, and thick enough so that a trail is left when the whisk is lifted from the mixture. 

3. Sift the flours together into a bowl. Carefully fold half the flour into the egg mixture gently pour half the cooled butter around the edge of the mixture and then fold it in. Repeat with the remaining flour and butter. Pour the mixture into the prepared tin. 

4. Bake in the pre-heated oven for about 35-40 minutes or until well risen and the top of the cake springs back when lightly pressed with a finger. Leave to cool in the tin for a few minutes then turn out, peel off the parchment and finish cooling on a wire rack. 

5. To make the crème au beurre moka (coffee butter cream), measure the sugar and water into a small heavy-based pan. Heat very gently until the sugar has dissolved. Bring to a boil then boil steadily for 2-3 minutes until the syrup is still clear and forms a slim thread when pulled apart between 2 teaspoons.

6. Put the egg yolks into a bowl and give them a quick stir to break them up. Pour the syrup in a thin stream over the yolks, whisking all the time. Continue to whisk until the mixture is thick and cold. In another bowl, cream the butter until very soft and gradually beat in the egg yolk mixture. Stir in the coffee essence to flavor. 

7. Cut the cold cake in half horizontally and sandwich the slices together with a thin layer of the coffee butter cream. Trim the cake edges and then neatly cut in half, and then cut each half into 4 to give 8 oblongs. Sieve the apricot jam into a small pan and warm gently. Brush the top and the sides of the cakes with the hot apricot jam.

8. To make the coffee icing, measure the butter, milk and coffee into a small pan and heat gently until the butter has melted. Add the shifted icing sugar and beat until smooth and glossy. Leave to thicken slightly, then use most of the cream to pour over each cake, smoothing the sides quickly if necessary. Leave to set and then decorate with the remaining piped coffee buttercream. 

Baking

The (Almost) Gluten-Free Pita Bread Challenge

I am relatively new to gluten free baking. Before we moved to Texas, I had absolutely no reason to bake anything gluten-free. I don’t have a gluten allergy and I didn’t know anyone who did either. However, it seems like every single person I know here in Texas is on a gluten-free diet. I have since made a few items like gluten free dinner rolls (delicious!) and have discovered gluten-free treats like macarons and macaroons (yes, these are two entirely different cookies). All of this to say, that I am still very new to gluten-free baking and, therefore, will explain what went wrong with this seemingly straightforward challenge. 

Baking can be done with a few simple ingredients, so it’s about simplicity and nostalgia – people are reminded of their childhood.” ~Paul Hollywood

I decided to tackle this challenge during the day on Friday while Roydon was at the dentist’s office. It was just me and my little baking assistant, James. This recipe asked for very basic pantry items except for one thing, nigella seeds. None of my local stores carried nigella seeds. I found a solution, though! A fitting replacement for nigella seeds is caraway seeds….which I also did not have in the pantry. So I decided to use celery seed instead. That should work well enough. Heck, I’m sure I could have used just about any spice/seasoning and it would have been fine. 

I started out gathering all of the ingredients on the counter. James was playing on the floor in front of me happy as can be chewing on whatever toy was closer. I turn my back for one second to get one last item out of the pantry, when I returned and saw that James had completely overturned his jungle gym and was giving me a look that stated quite clearly “Yeah, I did this! What you got to say about it.”

After rescuing James, I returned to the task at hand. I measured out the sugar, salt, yeast, white wine vinegar, olive oil, and cracked the eggs. I then went to measure out the gluten free flour and discovered that I had “just” the right amount for the bread. *phew* I then mixed up all of the ingredients in a bowl with 300ml of water. It was extremely sticky. A little too sticky. I was supposed to be getting a soft dough that was only slightly sticky. It was so sticky that it would have made kneading it on the counter close to impossible. Let’s see how many times I can say “sticky”. 

With all of this sticky, sticky dough, I figured I needed to add a bit more flour….the only flour I had left was a gluten filled one. What else was I supposed to do? I added the flour to my sticky dough. It definitely helped the sticky situation. Now on to the kneading! Of course, I need more flour to sprinkle on the counter before I turned out the dough…thus, my gluten-free pita dough ended up having more regular flour than gluten-free. Paul Hollywood would be so disappointed that I was butchering his gluten-free recipe. 

The dough was left to rise for an hour and a half and then was divided into 6 even balls. Those balls were rolled out into flat ovals and placed in the oven to bake. They looked beautiful when I pulled them from the oven and I was anxious to see if I have achieved the infamous pocket in the pita bread. I, sadly, did not. So, as far as Technical Bakes go, I had failed. Though, the bread was delicious with the Turkey meatball and kale soup that I made for dinner that night. Might I also add that the celery seed was way too strong and I probably should have gone back out to the store to find caraway seed to replace the nigella seed.Well, you live and learn. I know I certainly do. 

The next challenge is Mary Berry’s Mokatines!

Paul Hollywood’s Gluten-Free Bread

From BBC Food

Ingredients

30g/1oz psyllium powder

750g/1lb 10oz gluten-free strong bread flour, plus extra for flouring

3 tbsp nigella seed

15g/½ oz sugar

1 tbsp salt

21g/¾ oz instant yeast

3 large eggs

1 tbsp white wine vinegar

6 tbsp olive oil

Method:

1. Mix the psyllium powder with 300ml/10fl oz water. Set aside to allow the mixture to thicken.

2. Tip the flour and nigella seeds into a mixing bowl. Add the sugar and salt to one side of the bowl and the yeast to the other. Crack the eggs into the center of the flour, add the vinegar, olive oil and the psyllium mixture. Combine the ingredients to form a soft dough. Gradually add about 300ml/10fl oz water – you may not need it all, although the dough should be soft and slightly sticky.

3. Place onto a floured surface and knead to form a smooth dough. Place back in the bowl, cover and leave to rest for 1 ½ hours, or until doubled in size.

4. Heat the oven to 430° F and place 3 heavy baking trays in the oven to heat up.

5. Dust your work surface with flour. Divide the dough into 12 equal pieces and shape each one into a ball. Roll or press the pieces into oval shapes about 4mm thick.

6. Remove the baking tray from the oven and dust with a little flour. Lay four pitas on each tray and bake for 10-12 minutes, or until puffed up and cooked through. The pitas should have a slight color to them. Remove from the oven and wrap in a clean tea towel-this helps keep them soft.

Baking, Uncategorized

The Frosted Walnut Cake Challenge

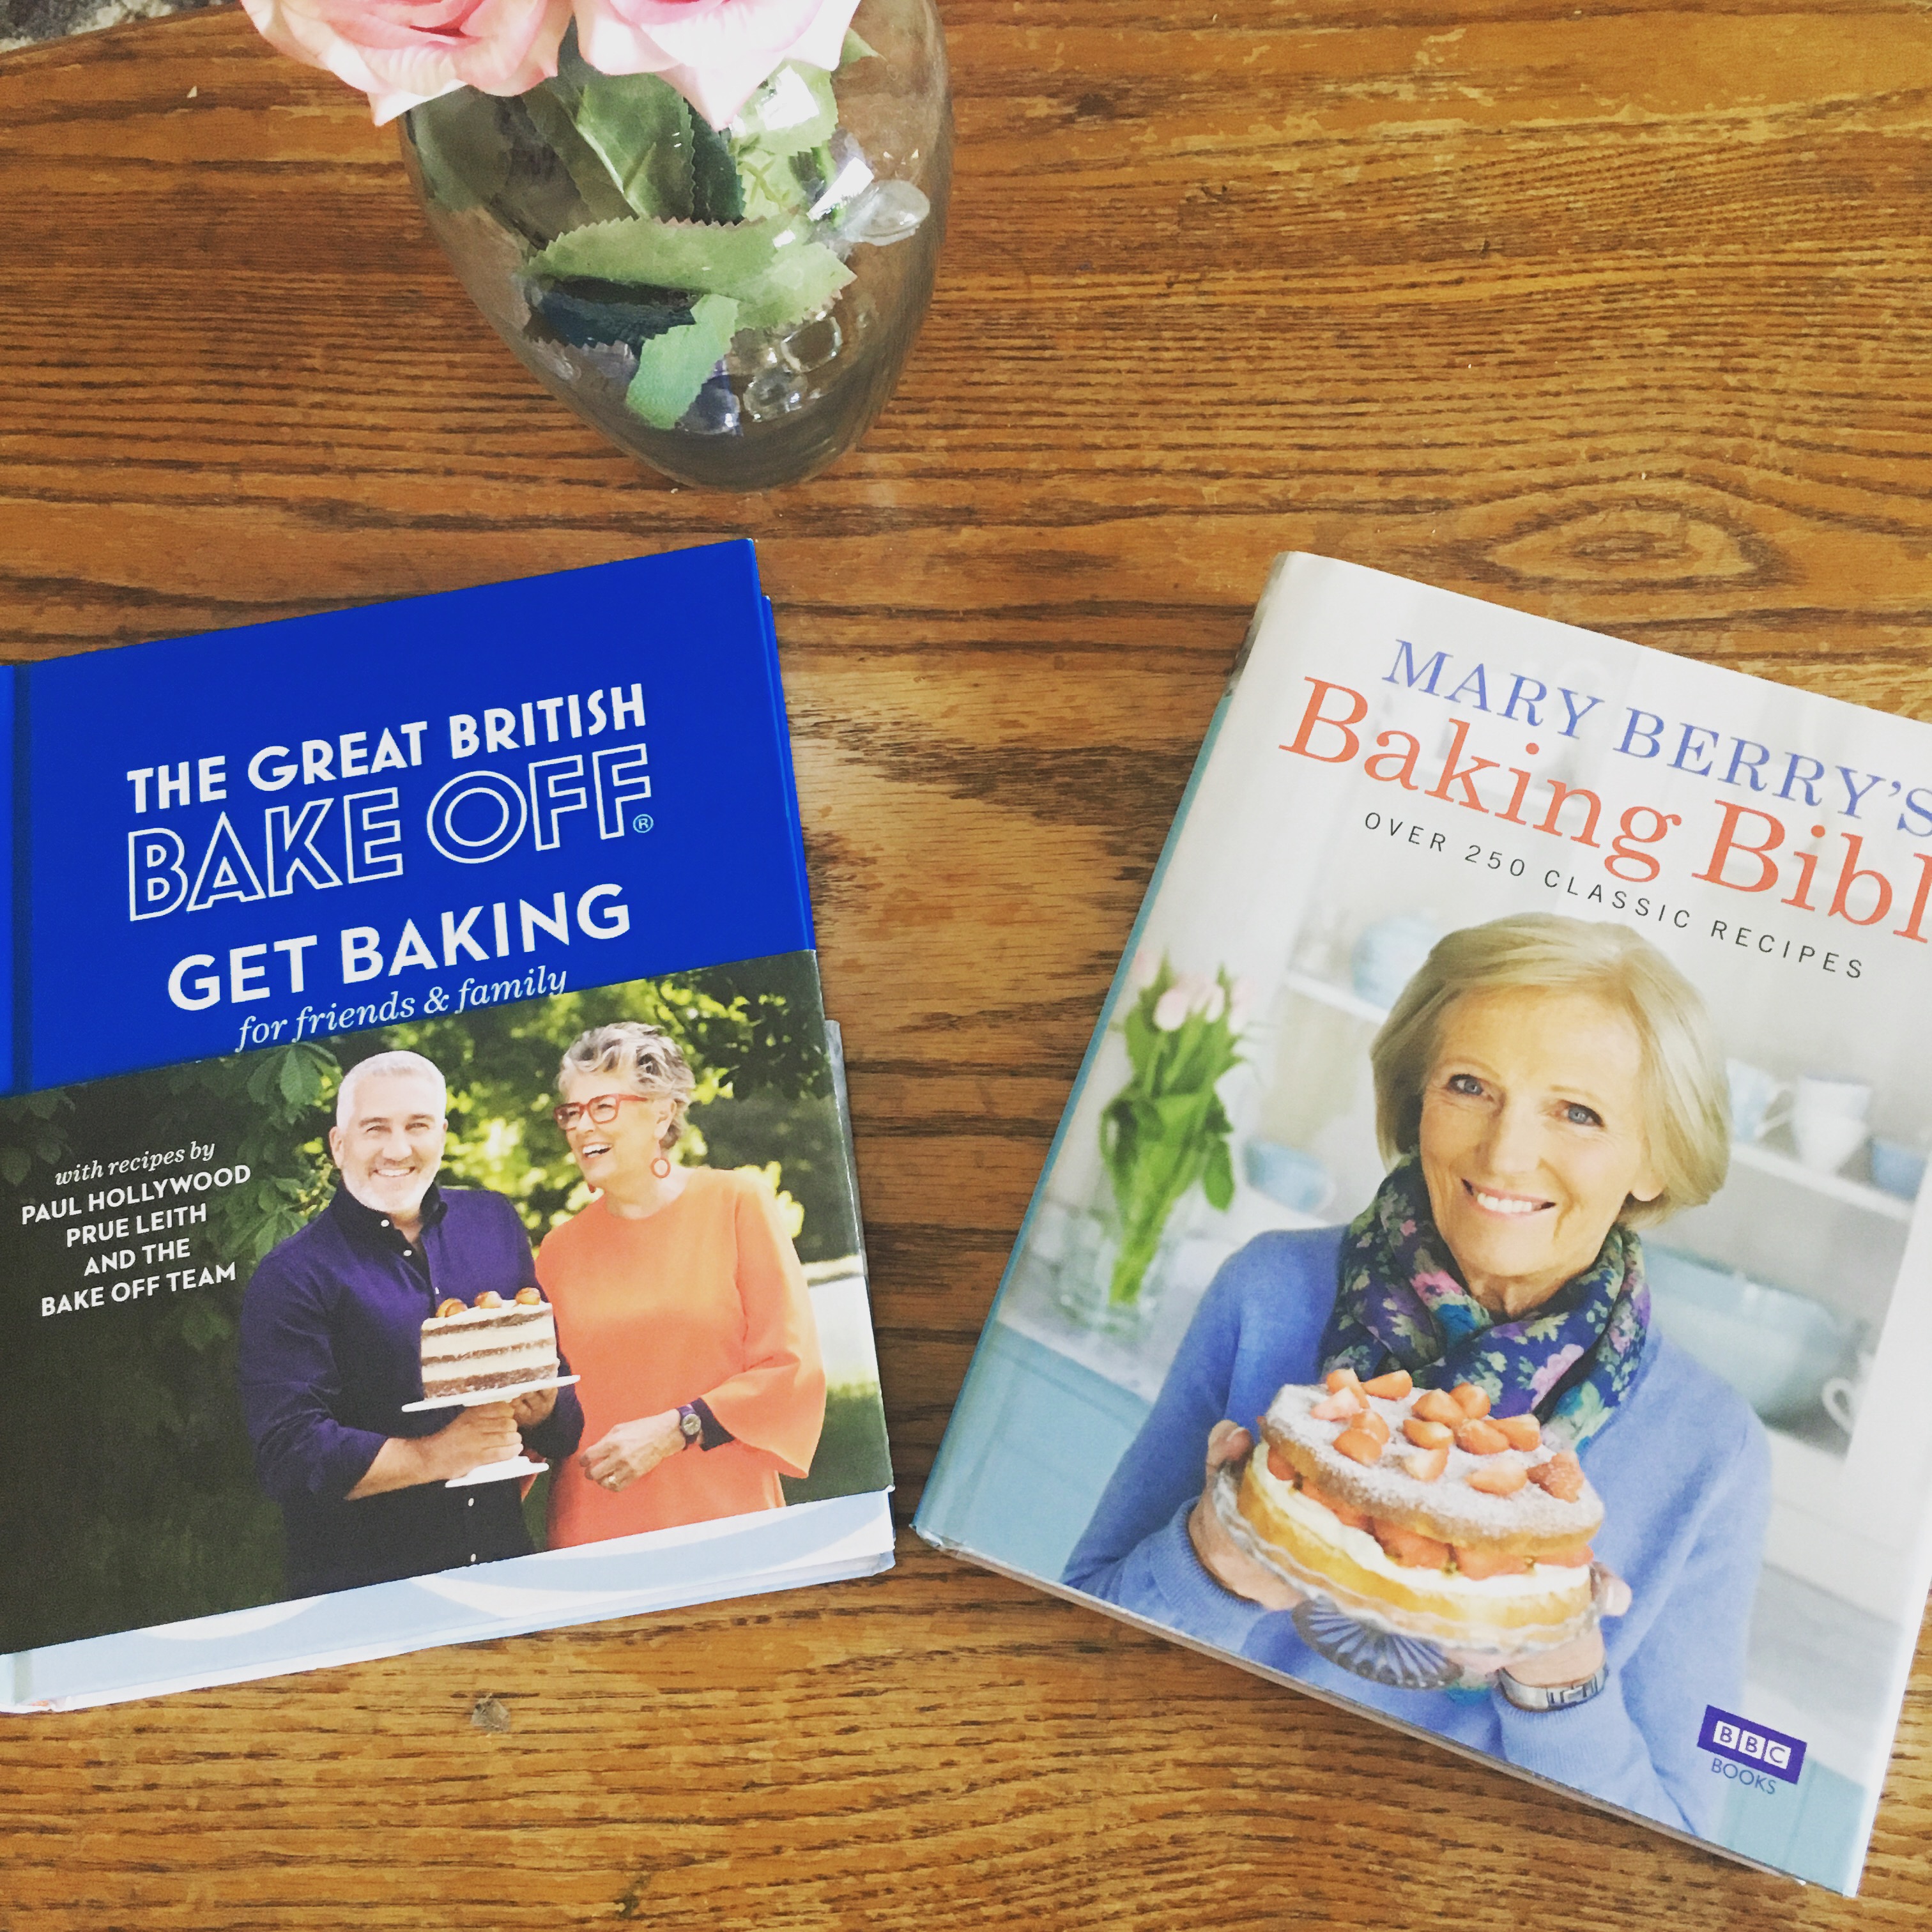
I’m back with another Technical Challenge from The Great British Baking Show! I had taken a year hiatus because of my pregnancy and the birth of our son, James. Motherhood has been quite an interesting and amazing journey so far. My time had been consumed by this little nugget. I honestly wouldn’t have it any other way. He is now 5 months old and able to play more independently, which grants me a little time here and there to get chores done or to start baking again! We have been so blessed with James. He is extremely easy going and has a hilarious personality. He’s just one giant goofball. Just this past week, he has mastered rolling over. Since then, He hasn’t stopped moving. Before I know it he’ll be crawling and then walking. I’m not sure I’m ready for that yet. It already feels like my little boy is growing up too quickly, and I keep picturing that sad day when he leaves home for good. Until then, He is going to be my little baking assistant.

I think baking is very rewarding, and if you follow a good recipe, you will get success.” ~Mary Berry

I make my return to this blog by taking on Mary Berry’s Frosted Walnut Cake. Upon looking at the recipe, the only true challenge I saw was with the boiled icing. First a show of hands, who has never heard of boiled icing? Me neither, although the method to creating this icing was very similar to making Swiss Meringue Buttercream. The big difference between the two is that boiled icing does not use butter. All it needs are egg whites, sugar, and cream of tartar to help with stability. Using a double broiler, the ingredients are whipped into submission until thick. The recipe said it’ll take 10 minutes, but after 30 minutes of vigorous hand whisking I could not get it thick enough. So with the assistance of my KitchenAid mixer, I had produced a beautiful icing. 

The cake itself was very simple to throw together. Ground walnuts, self-rising flour and baking powder for the dry ingredients, and eggs, butter and sugar for the wet ingredients. The batter resembled that of banana or (more appropriately) nut bread. I spread the batter evenly over two 8 inch spring form pans and baked in the oven for a little over 30 minutes. Once finished, it was a simple matter of waiting for it too cool on a wire rack before proceeding to assemble. 

Since the icing sets extremely quickly, I had to make it after the cake was cool. Once it was ready, I coated the two layers in the boiled icing and attempted to make it look beautifully swirly the way Mary Berry does it in her cookbook. However, she really wasn’t kidding when she said it sets quickly. So although it doesn’t look perfect, I was proud of how it spread on the cake. 

The finishing touches were the candied walnuts. Sugar and a couple tablespoons of water went into a saucepan in an attempt to caramelize it so that I can coat the 10 halves of walnuts in it. However, I started having issues with the caramel browning. It stayed clear until all the liquid had disappeared and I was left with dry clumps of sugar that refused to melt and only stuck to the pot. I found it so strange since I have made caramel several times before. I added a little bit more water and allowed it to boil again before coating the walnut halves. Once they were cooled I decorated the top of the cake. 

I was able to try this cake out on a couple of friends who came over for dinner. They both absolutely loved it. One even commented on the how the boiled icing was an older technique that their mother would always use on their cakes. I loved the cake as well. The Icing was incredibly sweet but it paired well with the not as sweet cake. The texture of the icing reminded me a bit of a marshmallowy Pavlova. We all enjoyed a second helping, and the cake was gone by the second day. 

I may actually add this cake to my arsenal. It was very simple to bake and I’d like to try my hand at getting the swirl design better. Next week, I will be attempting a more savory bake: Gluten-Free Pita Bread!

Frosted Walnut Layer Cake

(From Mary Berry’s Baking Bible)

Ingredients:

For the Cake:

225 g (8 oz) Softened Butter

225 g (8 oz) Sugar

4 Large Eggs

225 g (8 oz) Self-Rising Flour

100 g (4 oz) Finely Chopped Walnuts

For the Frosting:

2 Large Egg Whites

350 g (12 oz) Sugar

4 Tablespoons Water

¼ Level Teaspoon Cream of Tartar

For the Caramelized Walnuts:

2 Tablespoons Water

100 g (4 oz) Sugar

10 Walnut Halves

1. Preheat the oven to 300° F. Grease three 20 cm (8 in) cake tins then line the base of each tin with baking parchment.

2. Measure all the ingredients for the cake into a large bowl and beat until thoroughly blended. Divide the mixture equally between the tins and level the surfaces.

3. Bake in the pre-heated oven for about 25-30 minutes until the cakes are golden and springy to the touch. Leave to cool in the tin for a few minutes then turn out, peel off the parchment and finish cooling on a wire rack.

4. For the caramelized walnuts, tip the sugar and 2 tablespoons water into a pan and heat over a low heat until the sugar begins to melt. Increase the heat and cook the caramel to dark golden color. Remove from the heat, add the walnut halves and swirl to coat in the caramel. Transfer the walnut to a silicon sheet and leave to set.

5. For the frosting, measure all the ingredients into a bowl over a pan of hot water and whisk for 10-12 minutes until thick. Sandwich the cake layers together with a little of the frosting, then use the remainder to cover the top and sides of the cake, swirling the icing to form softened peaks. Work quickly as the icing sets rapidly. Leave to set in a cool place, but not in the fridge. Decorate with the walnut halves.

Uncategorized

The Gluten-Free Dacquoise Challenge

Have you ever had one of those days where you ruin everything you touch in the kitchen? Have you ever cried over something as trivial as cake before? Both has happened to me this past week. They definitely weren’t my proudest moments. Just as I was feeling pretty good about my baking skills, the world reminded me that I still have a lot to learn. 

As I started the Dacquoise challenge, I had also decided to bake a cake for Roydon’s work. The recipe I choose would have created a rich chocolate cake with strawberry cream cheese frosting in between layers and a beautiful drizzle of chocolate ganache gracefully dripping down the sides. I didn’t choose a particularly difficult cake to bake, and I didn’t want to resort to just using a box of cake mix. 

The cake didn’t rise and ended up chewy and rubbery. Cream cheese frosting was looking really nice, until I added the pureed strawberries, then it became an overly watery mess that spilled out over the sides of the cake. The chocolate ganache, which I have made dozens of times at this point, also ended up too watery and didn’t maintain a graceful drip look. The entire cake looked as if Dorothy just splashed water on it and was screaming “I’m melting, meeeeelting!” I tried the best I could to salvage this train wreck but to no avail. It was not suitable for him to bring to work. 

With the entire day’s work seemingly wasted, I had a bit of a meltdown. Maybe I should give up, I’m no good, it’s too hard. Roydon calmed me down by saying “Even professional bakers make mistakes and have bad days.” And you know, he’s right. Don’t tell him I said that… People tend to broadcast only their success and not the failures that led to their success. Every mistake is a moment to learn. I learned that I added too much cream to the chocolate in creating the ganache. That the pureed strawberries added more moisture to the cream cheese making it watery. I still haven’t quite figured out what went wrong with the cake itself…maybe it was just a bad recipe, which leads me to my lesson of only choosing recipes from a reliable source. I need to be better at doing my research. Baking is science, after all. It takes some studying. 

I had a ton of leftover strawberry cream cheese goop and ganache. And so, hating to waste it, I made a quick graham cracker crust and created a sort of “ice cream cake”. Between these three fail cakes and the Dacquoise, Roydon and I now have an abundance of cakes…so if anyone is interested in helping us dispose of them….please. 

This French classic of three layers of meringue with hazelnuts in the meringue mixture. If they roast them too dark, they’ll be bitter. If they chop them too finely, this releases too much oil and then the meringue will go runny.” Mary Berry (Season 2, Episode 8)

Yes. More meringue, more egg whites…Sigh. I think challenge may have trumped the Princess Cake in hatred I have for it…maybe. The first trouble I had was in blanching the hazelnuts. It took an hour and a stiff neck to ensure that all of the skins fell off the nut.

img_1653

Once that was done, I could finally start on the recipe. I mixed up the meringue and gently folded in the chopped roasted hazelnuts, praying that I didn’t deflate the meringue too much. I then piped the meringue out on the prepared trays. 

After about 5 minutes in the oven, I knew something was wrong…The meringues were already beginning to color. I kept rotating the trays around in the oven, but by the time the making was finished I had one meringue disc that was burn beyond repair. So, I threw that layer away and create another one. This time I used almonds since I didn’t have enough hazelnuts. 

img_1656

The coffee custard was straightforward like any other custard. I was thrown momentarily by the ingredient called Camp Coffee Essence. Upon research, it was either a coffee extract or instant coffee. I could not find coffee extract in the store, so I used instant coffee for the custard. Everything turned out beautifully. 

The ganache I made turned out perfectly to pipe on top of the meringue layers. The only thing left to make was the pralines. This would take some quick movements since the caramel hardens very quickly. After the sugar melted in the pan, I was to pour a teaspoon of lemon juice in with the hazelnuts. As soon as I pour the lemon juice in the pan, however, the caramel began to harden instantly and I had great difficulty in separating 12 clusters of three hazelnuts before becoming forever incased in the hard caramel. 

img_1660

Assembly of the layers should have been pretty straightforward, however, I found that my discs of meringue were not the same size and so it made applying the custard along the sides of the cake very difficult…I was thankful that I had placed the entire thing on a cooling rack with a sheet of parchment paper under the cake to catch any droppings. It was a mess. Luckily, I was finally able to finish the dacquoise and have a fairly presentable finish. 

Although I will probably never make a dacquoise again, I actually enjoyed eating it. It wasn’t overly sweet and the coffee in the custard wasn’t overwhelming. Overall, it was refreshing, but no…never again.

Hazelnut Dacquoise

From BBCfood.com

Preparation time: over 2 hours

Cooking time: 1 to 2 hours

Serves: 8-10

Ingredients

250g/9oz blanched hazelnuts

300g/10 ½ oz. caser sugar

25g/1oz cornflour

6 large egg whites

Pinch salt

For the Chocolate Ganache

150g/5 ½ oz. plain chocolate (around 35% cocoa solids), chopped

110/ml/3 ¾ fly oz. double cream

For the Coffee Custard Filling

600ml/20fl oz. full-fat milk

3 large egg yolks

125g/4 ½ oz. caster sugar

2 tbsp. Camp coffee essence

50g/1 ¾ oz. cornflour

300ml/10fl oz. whipping cream

For the Hazelnut Praline

50g/1 ¾ oz. caster sugar

36 whole blanched hazelnuts

½ tsp lemon juice

For the Decoration

100g/3 ½ oz. roasted, chopped hazelnuts

Method

1. For the dacquoise, preheat the oven to 180C/fan 160C/350F/Gas 4. Tip the blanched hazelnuts into the bowl of a food processor and pulse until coarsely ground. Spreadthe nuts out in a layer in a roasting tin and bake for 10-12 minutes or until golden-brown, stirring every three minutes.
2. Remove from the oven, transfer to a large bowl and leave to cool. When cool, stir in 100 g/3 ½ iz of the caster sugar and the corn flour
3. Reduce the oven temperature to 150C/130C (fan)/Gas 2
4. Line three baking trays with parchment paper and, using a small dinner plate as a guide, draw a 21cm/8 ¼ in diameter circle on each. Set aside. Carefully position oven racks in the upper, middle and lower third of the oven.
5. Make the meringue by pouring the egg whites into the clean bowl of a free-standing mixer fitted with the whisk attachment. Add the salt and whisk on medium speed for about two minutes, or until white and frothy. Increase the speed and add the remaining 200g/7oz caster sugar, one tablespoon at a time, to make a stiff, glossy, peaked meringue. Gently fold the ground hazelnut mixture through the meringue.
6. Spoon the meringue mixture to a large piping bag fitted with a 1.5cm/ 5/8/ in plain nozzle and pipe the meringue into a spiral starting at the center of each circle and working outwards to fill your template.
7. Bake for one hour, rotating the top and bottom baking trays halfway through cooking. Keep an eye on the meringues toward the end of cooking as they may catch and darken too much. Turn off the oven and leave to cool in the oven, with the door open, for at least 45 minutes.
8. For the chocolate ganache, place the chopped chocolate in a heatproof bowl. Pour the cream into a pan and heat until simmering. Take off the heat and pour the cream over the chocolate. Stir until the mixture is smooth. Cool, then place in the fridge to chill until really thick. Spoon the ganache into a piping bag fitted with a medium star nozzle. Set aside. (If the ganache is too stiff, allow to come to room temperature and beat with a wooden spoon until a smooth piping consistency.
9. For the coffee custard filling, heat the milk in a heavy-based pan and bring to the boil over a low heat. Meanwhile in a medium bowl, whisk the egg yolks, caster sugar and coffee and chicory essence together. Whisk in the cornflour, one tablespoon at a time. Pour the hot milk over the egg mixture, whisking continuously, then pour back into the pan. Bring to the boil, whisking continuously, reduce the heat and simmer, whisking for 2-3 minutes, or until smooth and very thick. (You need to use a whisk during this process as the mixture will suddenly thicken and form lumps.) Remove from the heat and leave to cool for at least an hour.
10. Whisk the whipping cream in a bowl until soft peaks form when the whisk is removed from the bowl. Fold half of the cooled coffee mixture into the cream, adding as much as necessary to form a spreadable consistency.
11. For the hazelnut praline, line a baking tray with non-stick baking paper. Melt the caster sugar in a small frying pan until it turns golden-brown or reaches 300C/572F on a sugar thermometer. Add the hazelnuts and lemon juice, stir well and tip onto the lined baking tray. Using two teaspoons and working quickly before the caramel sets, form 12 praline clusters of three hazelnuts each for decoration.
12. To assemble the dacquoise, place one of the meringue layers on a large, flat serving plate and spread with one-third of the coffee custard filling. Place another meringue layer on top and spread with another third of the coffee custard filling. Top with the final meringue layer and spread the remaining coffee custard filling on the sides of the dacquoise, leaving the top bare. Press the roasted chopped hazelnuts onto the sides of the dacquoise to cover. Pipe 12 swirls of chocolate ganache on the top of the dacquoise and decorate with the hazelnut praline.
Uncategorized

The Apricot Couronne Challenge

This past week, I celebrated my 28th Birthday. Since I had no work scheduled, I decided to spend the day doing one of my favorite activities: Baking. I was very excited to bake my own cake (I know it sounds weird) and was a first thinking about some sort of chocolate cake with ganache. However, I came upon a recipe for Blueberry Lemon Cheesecake and my mouth started watering. It sounded like the perfect thing to make!

CD355B0F-A82A-4ACC-BB0E-06DD232DF905
I apologize for not having a photo of the finished product..it didn’t last long.

It was a beautiful, warm, sunny day. I thoroughly enjoyed baking while sipping on a glass of wine with the windows open to allow the warm breeze inside. Roydon texted me in the morning and asked that I be dressed up and ready to go somewhere by 5:45 pm. This gave me a lot of excitement, mainly because the last time that He texted me with an obscure message like that was the day he proposed to me. So, I knew he was brewing up something special for my birthday.

Sure enough, I was surprised to find that we were going to dinner at the Reunion Tower in Downtown Dallas. If you don’t understand the excitement, allow me to explain. Reunion Tower is just that, a tower. However, at the top of a tower is a massive ball that sort of resembles a golf ball or the Epcot Center at Disney World. Inside this ball is a super fancy restaurant called Five-Sixty by Wolfgang Puck. Here’s the grand kicker, the entire restaurant rotated slowly inside the ball to give a complete view of Dallas and the area around it.

E4078364-C80A-44B3-9E50-A6D85049B033

If that wasn’t enough, the food was absolutely amazing! The entire theme of the restaurant was Asian inspired. We definitely shot the works in terms of ordering. A bottle of New Zealand wine, an appetizer of calamari, and our main dishes of Roast Duckling with Plum Sauce and Wild Salmon. There was definitely a ton of food, but it felt like a crime to stop eating until the plate was completely empty. I did end up taking some of my duck home. It wasn’t because I was full. I had gotten to the part of the duck that contained bones in it, and attempting to cut the meat away all fancy like was proving too fruitless. I considered picking up the succulent duck with my hands and gnawing at it like a ravenous wolf but I figured that sort of behavior would be frowned upon in this fancy establishment. So I resisted, I brought it back home to when I could properly eat the leftovers over a kitchen sink. What a lady.

7706401A-3C25-43EC-A902-DC34840E37E8

This birthday was definitely one to remember! I had also received in the mail from my parents and my sister two different GBBO inspired cookbooks. One was Mary Berry’s Baking Bible and the other were a consolidation of the recipes baked in Season 8 of the show. I was very excited to receive these gifts. I can’t wait to start baking with them!

2BAB0B12-B995-4305-A94E-A644C934B8B5

An old favorite, Mary. Apricot Couronne. I hope they don’t mess with my recipe. The first thing they have got to do is prepare the dough. Once it’s risen, they have to roll it out into a rectangle, then they smother the filling on top. Now, this is the tricky bit. Once the filling has gone in, what they got to do is cut right down the middle of the length of the bread dough itself and expose all the interior and then just twist it together, and then join it together to form a halo.” Paul Hollywood Season 2, Episode 6

I was not too worry about this challenge at all. The basics of this sweet bread resembles my Mother’s beloved Nut Wreath that she makes for Christmas and Easter, except with different fillings.

The recipe itself asks to hand mix the dough together with your hands and to work it through past the wetness until it forms a nice soft dough. This was established quickly enough and then allowed to rise whilst I got the filling made.

F7E0E17F-4D1E-41F9-BFA7-F011E5A24ED8

The filling was a combination of butter, brown sugar (or what the British call “muscovado sugar”), dried apricots (which have been chopped and soaked in orange juice), raisins (I really would have loved to omit this ingredient…) walnuts, orange zest, butter, and a bit of flour. Again, really simple to combine together. I was thanking God that I had my trusty kitchen scale to assist in the measurements.

77A5243F-D8C9-40FD-8F01-027C4413A1CD

Once the dough had time to rise, I rolled it out into a rectangle taking care not to knock out too much air. After evenly spreading out the filling on the dough, I rolled it up and sliced the dough down the middle. I rotated the two ropes of dough and filling so that the cut sides were facing up and twisted the two together. I then formed the crown and gently lifted the entire thing on a baking pan to rise for another thirty minutes.

89D9A3DE-051C-4FA4-AF7A-8F6422085177

After baking in the oven for the allotted time, I brushed a bit of warmed marmalade over the crown and drizzled the icing. The final touch was the sprinkling of the sliced almonds over the top. The Couronne looked so beautiful and magnificent! I’m not entire sure that I rolled the dough out enough, since my Couronne resembled less of a crown and more of a tight plait. However, the shape of the sweet bread did not affect the taste. It was absolutely delicious and goes perfectly with a cup of coffee.

44ec3bd9-e0b9-4609-88fb-18410d404d72.jpeg

Apricot Couronne

Via PBSfood.com

Ingredients

For the dough

250g strong white bread flour, plus extra for dusting

5g salt

7g instant yeast

50g unsalted butter, softened, plus extra for greasing

135ml milk

1 egg, lightly beaten

For the filling

90g unsalted butter, softened

70g light muscovado sugar

120g ready-to-eat dried apricots, chopped and soaked in orange juice

35g plain flour

60g raisins

65g chopped walnuts

1 orange, zest only

To finish

50g apricot jam

200g icing sugar

25g flaked almonds

Directions

1. Tip the flour into a large mixing bowl and add the salt to one side of the bowl and the yeast to the other. Add the butter, milk and egg and mix to combine, using your hands. Continue to mix until you’ve picked up all of the flour from the sides of the bowl. Use the dough to clean the inside of the bowl and keep going until you have a soft dough.
2. Tip the dough onto a lightly floured work surface and begin to knead. Keep kneading for 10-12 minutes. Work through the initial wet stage until the dough starts to form a soft, smooth skin.
3. When the dough feels smooth and silky, put it into a lightly oiled bowl. Cover the bowl with a tea towel and leave to rise for one hour, or until doubled in size.
4. While the dough is rising, make the filling. Beat the butter and muscovado sugar together until smooth. Drain the apricots and add to the butter mixture along with the flour, raisins, walnuts and orange zest. Mix to combine.
5. Line a baking tray with baking parchment or silicone paper.
6. Turn the risen dough onto a lightly floured surface. Taking care not to knock the air our of it, roll out the dough into a rectangle, approximately 33×25 cm/13×10 in, Turn the dough 90 degrees if necessary, so you have a long edge facing you. Spread the apricot mixture evenly over the dough. Roll up the dough tightly (like a Swiss Roll). Roll it slightly to seal, then cut it in half lengthways (you can leave one end joined to help you twist the dough and form the circular crown).
7. Twist the two dough lengths together to make a rope, then join the ends of the rope to form a circular ‘crown’. Transfer to the baking tray.
8. Put the tray inside a clean plastic bag and leave to prove for 30-45 minutes, or until the dough springs back quickly if you prod lightly with your finger. Meanwhile, heat the oven to 200C/400F/Gas 6.
9. Bake the couronne for 25-35 minutes, or until risen and golden-brown. Set aside to cool on a wire rack.
10. Gently heat the apricot jam with a splash of water, then sieve it and brush it over the warm loaf to glaze. Mix the icing sugar with enough water to make a thin icing, drizzle over the loaf and sprinkle with the flaked almonds. Leave to cool before serving.


C8BA993B-4A3B-4350-97C9-987F9219A65B


Uncategorized

The English Custard Tart Challenge

I have never had very bad allergies before. However, since moving to Texas I am constantly sneezing, have watery eyes, and a sore throat. Most of these symptoms have been relatively manageable. Except for this past week. Last Saturday morning, I woke up to a massive pressure headache, drippy nose, a bit of nausea, and a whole ton of phlegm in my throat. I stayed in bed for the majority of the day, while my husband bustled around making sure I had everything I needed for a quick recovery.

It’s funny the different ways Roydon and I handle being the nurse while the other is sick. My style is to make lots of homemade soups, and baked goods while being strict on his meds and water intake. Then to leave him to sleep while I quietly did my tasks. While I was down and out, Roydon asked me what I wanted from the store that we didn’t already have in stock. I had given him a few items to get like soup, ginger ale, and saltine crackers. After he was gone for about an hour, he returned with three different types of medicine, ten cans of soup, a 6-pack of vitamin water, two 2-liters of ginger ale, and a giant box of saltines. Needless to say, He took very good care of me and I was up on my feet by the end of the day.

Beautifully formed, it’s solid, the pastry is baked. You can see it’s got a beautiful color all the way around, no soggy bottoms. When you look at the custard, you can see its level, It’s got a slight wobble to it. But if I cut this open…The custard is perfectly cooked, it’s creamy and it’s smooth. Baked well, there is nothing better than a good custard tart.”  Paul Hollywood Season 2, Episode 4

I was pretty excited about this challenge, mostly because I’ve made a custard several times already and there’s no egg whites. To me it looked like a pretty straight forward pie. I gathered all of the ingredients which included ground almonds. This goes to show that I definitely learn from my mistakes. I purchased the slivered, blanched almonds from Sprouts and made sure the almonds were chopped up until it had a powdery consistency. The dough was all combined by hand, especially when breaking up the chilled butter and incorporating the egg (I’m all for playing with dough, but I hated the feeling of slimy egg.)

1f25bb52-0e5e-4243-bd8b-af3267a102eb.jpeg

Once the dough was resting in the fridge, the egg yolks were combined with the sugar which then was combined with the warmed milk.

65E6A06D-A158-4088-9EBA-04A542D0D7F3

Seeing how many of the bakers on the show had issues getting their tarts out of the pan, I heavily greased my cupcake pan with butter and then laid strips of parchment paper in each hole.

a8a28c45-ab1b-4019-a2b1-0068d4ca5bbe.jpeg

The hardest part was actually pouring the custard into each of the individual cups without spilling. I had poured all of my custard in a glass measuring cup because it had a lip to pour, but this failed me greatly and I ended up spilling a bit here and there.

With a sprinkle of nutmeg on top of each tart, they were relinquished to the oven for 25 minutes.

7B84ADB6-57E4-4A76-8BCE-6A080CA74921

When the timer went off, I was initially worried that the custard wasn’t baked through all the way. They wobbled quite a bit, but after gently touching the top of one and finding it firm, I decided that they probably needed to set a bit outside of the oven.

CEA4137D-3A00-49DE-90EE-2E2DECFB151F

I am pleased to report that when I was finally able to cut into a tart, the custard was nice and firm and did not leak out. They were extremely tasty as well.

1cafe2af-91db-4432-8bf7-1a02b50fbd2f.jpeg

There was a bit of custard left over as well as a bit of the delicious crème anglaise from the previous challenge. Since we gave away the rest of the tarts to Roydon’s coworkers, I was more than happy to make another batch!

5d8ab083-3987-4438-a1ca-103a582ed126.jpeg

Next Challenge: Apricot Couronne